Efficient Sprinkler Placement in Early Game of Stardew Valley: A Guide to Maximizing Yield
Stardew Valley is more than a simple farming simulation. With its intricate mechanics and depth, maximizing productivity in every area, from fishing to farming, becomes an art. This article will focus on one crucial aspect for newcomers: getting the most out of your sprinklers in the early game.
Note: This guide assumes you are familiar with the basic gameplay mechanics of Stardew Valley, such as planting crops, fishing, mining, and so on.
Understanding Sprinkler Types and Their Ranges
In the early stages, you get access to the Basic Sprinkler, which waters crops in a plus (+) pattern. While it can’t compete with Quality or Iridium Sprinklers in range and form, the Basic Sprinkler has its uses if you understand its range and limitations.
Sprinkler Placement and Range: The Basics
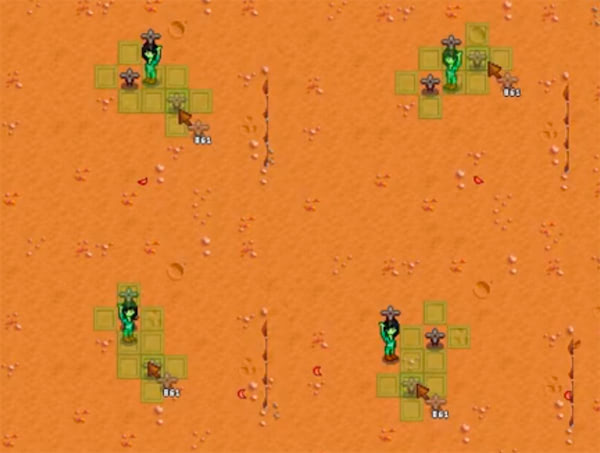
The Basic Sprinkler has a “plus-shaped” range. It will water the tile above, below, to the left, and to the right of it, but not diagonally. Given this, there are eight positions around a single Basic Sprinkler, allowing for multiple orientations. This versatility is particularly useful in the early game.
Tip: Use the UI Info Suite mod to visualize sprinkler ranges more easily.
Sprinkler Arrangements for Different Farm Layouts
Standard Farm: Avoiding the Pond
On the standard farm, there’s a small pond in the lower-right corner. Placing the first sprinkler in such a way that the next one falls to its bottom-left can help you circumvent the pond, reducing the area you need to clear initially.
how to arrange Basic Sprinklers on the Standard Farm.
Forest Farm: Maximizing Width
The Forest Farm has a wider area in front of the farmhouse. Depending on the orientation, you could fit different numbers of Basic Sprinklers. Again, experimenting with placement is key to optimizing your yield.
Crop-Specific Layouts
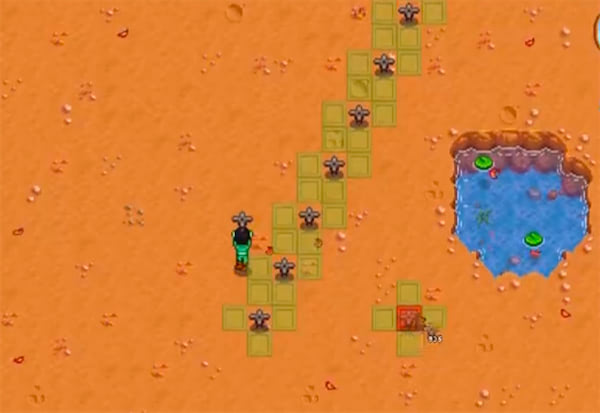
For example, if you’re focusing on a Hops-to-Pale Ale strategy, you’ll want to adjust your Basic Sprinkler placement for the trellised nature of Hops plants. A common arrangement is to place seven Basic Sprinklers in a diagonal line, leaving a row empty in between so you can harvest your Hops.
A screenshot illustrating the best sprinkler placement for Hops.
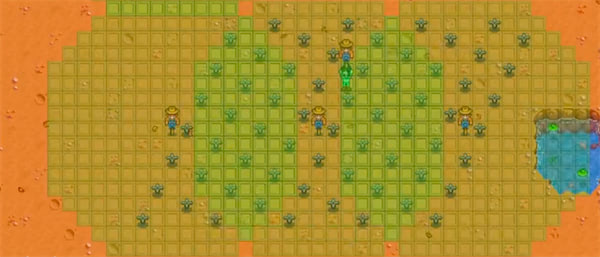
Optimal Scarecrow Placement
To keep pesky crows away, Scarecrows are essential. The challenge is in placing them effectively without wasting valuable farming tiles.
Here are some configurations that ensure maximum coverage without wastage:
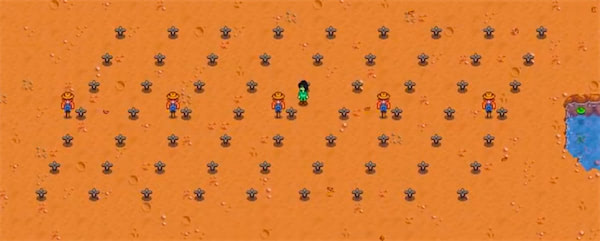
- Two Rows Between Scarecrows: Place scarecrows so that they’re separated by two rows of crops, ensuring each Scarecrow covers exactly 247 tiles.
- Scarecrow on either side: For easier memorization, place the first Scarecrow to the left of a sprinkler, then alternate the sides with each new Scarecrow.
- Avoid Overcrowding: Never let Scarecrows cover more than ten tiles between them; otherwise, some tiles will be unprotected.
optimal Scarecrow placement in relation to sprinklers.
The Hops-to-Pale Ale Strategy: A Case Study
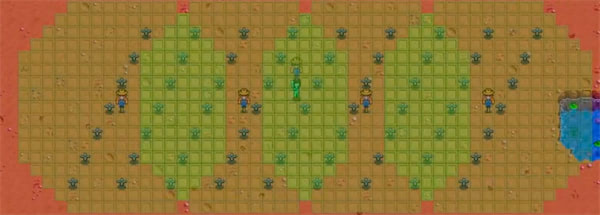
This setup allows you to plant 252 Hops plants, yielding about 1.57 million gold when converted to Pale Ale. While the Scarecrow arrangement in this strategy may seem wasteful, you can either:
- Move the second Scarecrow down one tile to cover all tiles, or
- Simply build an extra Basic Sprinkler to make up for the “lost” tile.
Counting the Cost and Public Opinion
Early on, I remember being criticized for recommending Basic Sprinklers, with many in the Stardew Valley community saying they were a waste of resources or inefficient. However, as more people have started using Basic Sprinklers, there seems to be a greater appreciation for their utility in the early game.
Starfruit and Earnings: Another Example
Apart from Hops, you can also focus on Starfruit for a lucrative option. Planting 220 Starfruits in a similar setup can yield about 1.81 million gold in three cycles.
Conclusion
When it comes to optimizing sprinkler placement, simplicity and memorability often trump theoretical efficiency. The Hops-to-Pale Ale strategy is an excellent example of how a simple, easy-to-remember layout can still maximize your yield.
Stardew Valley continues to captivate players with its depth and complexity. As you gain experience, don’t be afraid to experiment and find what works best for you, even if it goes against the prevailing wisdom of the community.
Tip for Interested Players: The UI Info Suite mod mentioned earlier is not readily available on Nexus Mods, but you can find it by searching around. It greatly helps in planning your farm layout.