How to Fast Travel in Stardew Valley: Tips and Tricks
The map in Stardew is large, and to be honest, the player’s movement speed isn’t so fast. A lot of times, traveling can be stressful and time-consuming. For example, you are on the 108th floor in mines, but it’s late, and time limits you to reach the checkpoint on level 110th because you need to go back to bed.
Luckily Fast Travel exists in the game in several variations, which I’m gonna list and explain them in this post and create the ultimate fast-traveling guide for you so you can worry less about time and exhaustion.
Using the Horse to Fast Travel
If you want to acquire a new companion to speed up your travels in Pelican Town, you’ll need to buy the Stable from Robin. It costs 10,000 gold and requires 100 hardwood and 5 iron bars. Once Robin finishes building the Stable, the horse will automatically spawn.
Using Coffee and Espresso for a Temporary Speed Boost
These two drinks will boost your speed for a specific amount of time, and both are pretty useful in the early and late game.
You can create coffee by placing 5 coffee beans in a Keg or buy it from the Saloon for 300 gold. It’s best to make it by yourself until you start earning a lot of money. If you own the Coffee Maker, you can get one free cup of coffee every morning. You can get the Coffee Maker by fulfilling Evelyn’s special order.
You can make Triple Shot Espresso by combining three cups of coffee, but first, you need to buy the recipe from Gus for 5,000 gold. Also, you can buy it from the Desert Trader for one diamond but it’s not worth it.
Coffee gives you a speed boost that lasts 1 minute and 23 seconds, while Espresso gives you a boost that lasts 4 minutes and 12 seconds.
The Return Scepter
This item will teleport you to your farm with only one click. However, it costs 2 million gold and can be bought from Krobus. The Scepter saved me many times when I was on low health and overrun by enemies in the Skull Cavern and in the Volcano Dungeon.
Using Warp Totems to Teleport to Specific Locations
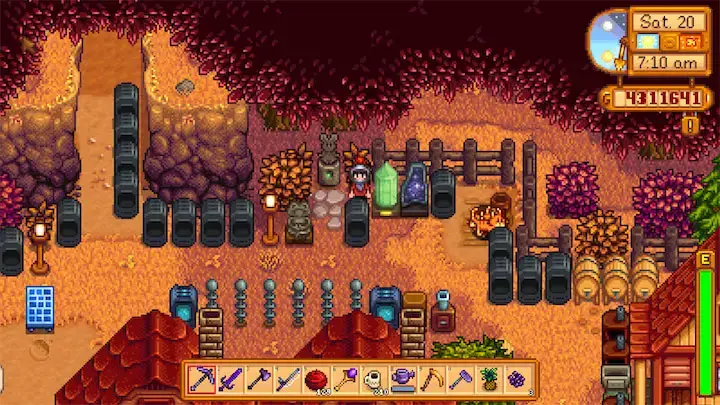
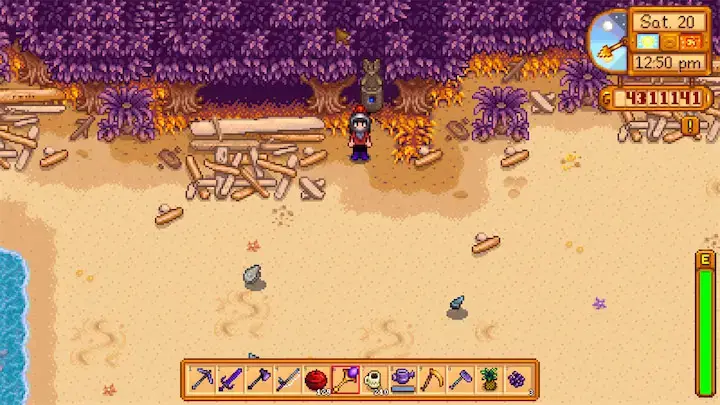
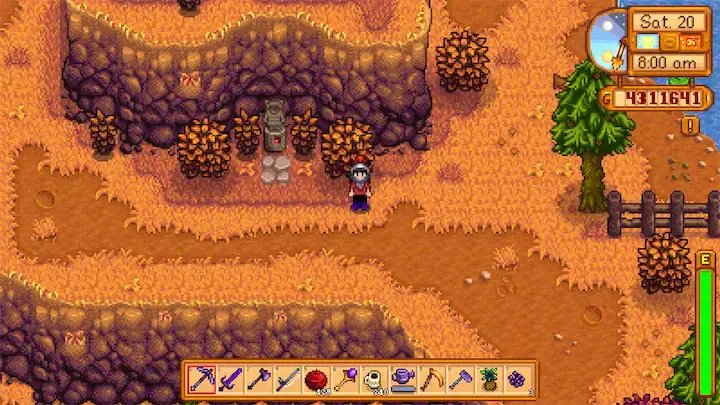
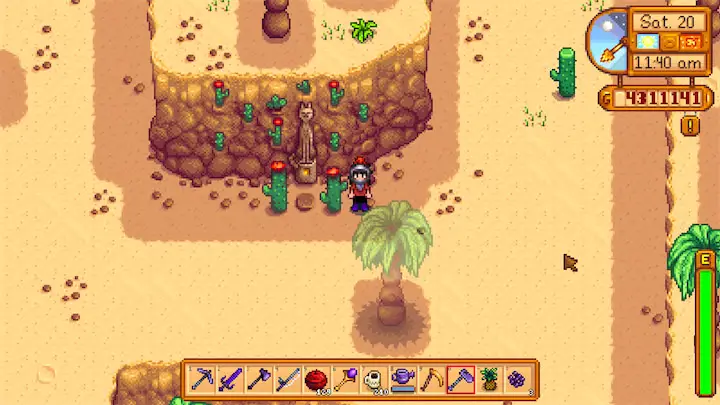
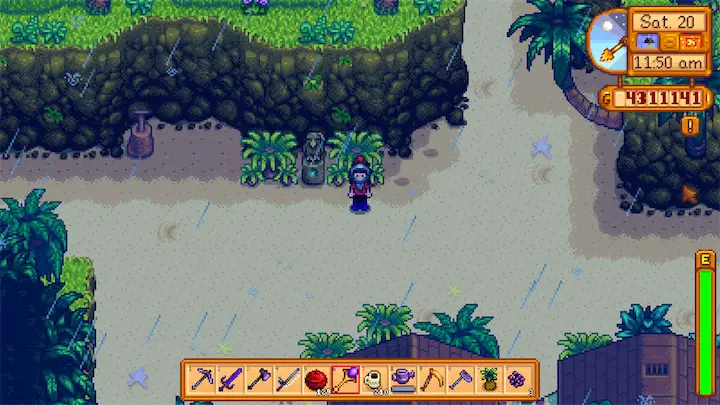
If you noticed strange statues in certain places in the game and wondered what their purpose was, well they work as teleport points for warp totems. However, you can use them only once.
There are five types of Warp Totems:
- The Beach Warp Totem requires 1 hardwood, 2 corals, and 10 fibers, and can be unlocked at Foraging Level 6.
- The Mountain Warp Totem requires 1 hardwood, 1 iron bar, and 25 stones, and can be unlocked at Foraging Level 7.
- The Farm Warp Totem requires 1 hardwood, 1 honey, and 20 fiber, and can be unlocked at Foraging Level 8.
- The Desert Warp Totem can be obtained by buying a recipe from the Desert Trader for 10 iridium bars and requires 2 hardwood, 1 coconut, and 4 iridium ores.
- The Beach Warp Totem (Ginger Island) can be obtained by buying a recipe from the Volcano Dwarf for 10,000 gold and requires 5 hardwood, 1 dragon tooth, and 1 ginger.
Here are teleport statues:
Farm.
Beach.
Mountain.
Desert.
Ginger Island.
Using Obelisks to Fast Travel
Obelisks serve as long-lasting warp totems and are costly to craft. However, once obtained, they provide unlimited fast travel with no restrictions. Pairing them with the Return Scepter creates an excellent fast-travel combo. They will take you to the exact location as warp totems.
After you complete the Goblin Problem quest given by the Wizard, you’ll be able to purchase these bad boys. There are four of them and each one of them costs 500,000 gold. Also, there is one more you can build on Ginger Island for a price of 20 Golden Walnuts.
- The Earth Obelisk which will take you to the Mountain requires 10 Iridium Bars and 10 Earth Crystals
- The Water Obelisk which will take you to the Beach requires 5 Iridium Bars, 10 Calms, and 10 Corals.
- The Desert Obelisk which will take you to the Desert (duh) requires 20 Iridium Bars, 10 Coconuts, and Cactus Fruits.
- The Island Obelisk which will take you to Ginger Island requires 10 Iridium Bars, 10 Bananas, and 10 Dragon Tooth.
Mini-Obelisk
After you complete the Wizard’s quest called “A Curious Substance” you will unlock the recipe for this structure. You can position two Mini-Obelisks anywhere on your farm’s grounds, and then teleport from one to another.
Using the Minecart System for Fast Travel
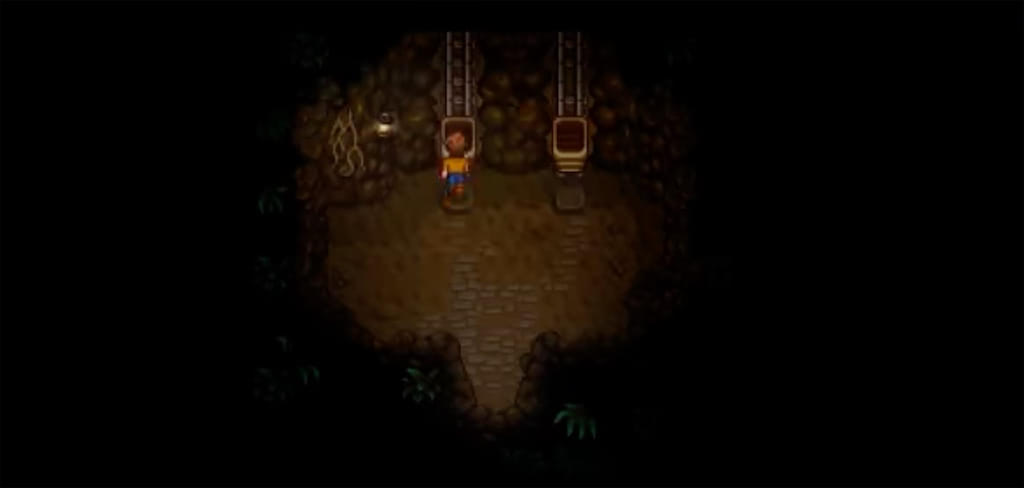
In Stardew Valley, you can access the Minecart for transportation once you finish the Boiler Room Bundles. Alternatively, you can purchase the “Minecarts” at JojaMart from the Joja Community Development Form, which costs 15,000g.
It’s located north of the bus stop and it can take you to three locations:
- Mines
- Quarry
- Pelican Town
Unlocking Shortcuts
The Community Upgrade will be available in Robin’s shop once the Community Center is completed. An option to build shortcuts will be available once you build a new house for Penny and Pam.
Then you can spend 300,000 gold to create really valuable shortcuts.
The first one allows you to go to the Beach from Cindersap Forest. It’s located east of Leah’s Cabin. There will be a gap under a green palm bush. From there, you can reach the left side of the beach where the debris is located.
The second one allows you to go to the Tide Pool from Town. It’s located below the ice cream stand near the museum. Walk to the little tree stump and around the fence down to a small path at the bottom. Follow the path through the trees to the Tide Pool.
The third one allows you to travel from the Mountains to the Town. There is a small bush below the quarry’s bridge. Near it there’s a path that follows the river – follow it to end up above the Joja Mart.
The fourth shortcut allows you to travel to the Backwoods. Along the backwoods path, there is a small set of stairs. Descend the stairs and turn right to reach the bus stop. Alternatively, you can turn left and enter the tunnel.
The fifth shortcut will take you from Adventures Guild to small islands in the river. Just go over the wooden plank that is near the Adventures Guild.