Master the Rain Totem in Stardew Valley: Functions, Uses, and Obtaining
In this tutorial, we’ll discuss the Rain Totem, including its primary functions, common uses, and how to obtain it. The Rain Totem is described as significantly increasing the chance of rain the following day, but its actual effect differs from its description, depending on your location in the game.
Weather Mechanics in Pelican Town and Ginger Island
The weather in Pelican Town and Ginger Island is independent of each other. Ginger Island’s weather is relatively simple, with only sunny and rainy days. It’s important to note that rainy days and thunderstorms are two different types of weather; Ginger Island does not have thunderstorms, so placing a Lightning Rod there will not yield any batteries.
On your first day on Ginger Island, it will always be sunny. After that, there is a 24% chance of rain. If you use the Rain Totem on Ginger Island, it will be guaranteed to rain the next day.
Using Rain Totem in Pelican Town
Anywhere outside the Ginger Island map is considered part of Pelican Town, including the desert and Skull Cavern. When using the Rain Totem in Pelican Town, the weather outcome depends on the current day’s weather. There are only two possibilities: if it’s a thunderstorm day, using the Rain Totem will result in another thunderstorm day. If it’s any other weather, the next day will be a regular rainy day. However, if the following day’s weather is predetermined, using the Rain Totem will be a waste, as the weather won’t change.
There are many rules for predetermined weather, such as rain on Spring 3 of the first year, sunny on Spring 12 and 24, no thunderstorms in the first Spring, sunny on the first day of each month, thunderstorms on Summer 13 and 26, sunny on wedding days and festival days, etc. Be aware of the date before using the Rain Totem to avoid wasting it.
Exceptions: Night Market
The Night Market has different rules than other festivals. According to the game’s settings, it can be considered an open festival, separate from regular festivals. This difference should be kept in mind when using the Rain Totem during the Night Market.
Wind, Snow, and Other Weather Effects
Weather effects like wind and snow are essentially just visual differences, with the underlying weather mechanics still based on sunny days. Snowy days will not trigger rainy day events, and Winter Seeds planted during snowfall will not receive irrigation benefits.
Uses of the Rain Totem
There are several common uses for the Rain Totem. One is for irrigation: if you’re busy mining in the Spring and your farming level is low, you might have money in the Summer but lack the ability to craft sprinklers to grow Starfruit. Manually watering the crops is tiring, or perhaps you’re on the Beach Farm where sprinklers are not an option. In such cases, using the Rain Totem can allow you to plant crops on a large scale and rely on rain to keep them irrigated, helping you increase your farming level significantly.
Using Rain Totem for Thunderstorms and Batteries
The second use of the Rain Totem is to summon thunderstorms to obtain batteries. Batteries are useful for crafting a large number of Crystalariums and Iridium Sprinklers. The primary methods to obtain batteries in the game are through Lightning Rods and Solar Panels. However, Solar Panels are unlocked quite late in the game, so if you’re in a hurry, relying on Lightning Rods is the way to go. Since there are no thunderstorms in the first Spring, the earliest thunderstorms can occur is during the first Summer.
The most significant thunderstorm days are Summer 13 and 26, which are fixed, while the Summer festivals are on the 11th and 28th. If you have more than 13 Rain Totems, you can have 15 consecutive days of thunderstorms. Even if you only obtain ten batteries per day, you’ll have 150 batteries, making it easy to craft 100 Crystalariums.
Triggering Rainy Day Mechanics with the Rain Totem
The third use of the Rain Totem is to trigger rainy day mechanics. Some events only occur on rainy days, and waiting for rain can take a long time. For example, Shane’s 6-heart cliff event requires a rainy day, and if you don’t trigger this event, you won’t be able to activate subsequent events. Another example is purchasing the Mermaid’s Pendant for marriage; the Old Mariner only appears on rainy days. If there are no rainy days in Winter or you can’t wait for one, you can use the Rain Totem to force a rainy day to buy the pendant.
A small tip: if you plan on getting married multiple times in a single game, you can buy a pendant, propose, and then purchase another pendant from the Old Mariner to prepare for the next marriage. However, this approach might be considered somewhat unethical. These three uses are the primary purposes of the Rain Totem.
Obtaining the Rain Totem
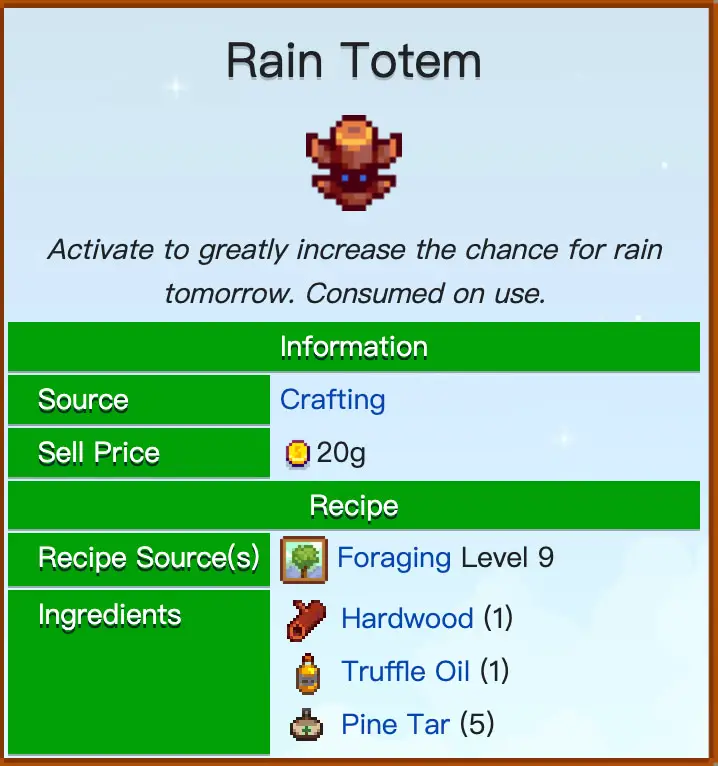
There are two main ways to obtain the Rain Totem. The first is to craft it yourself. The recipe is unlocked at Foraging level 9, and the materials needed are one Hardwood, one Truffle Oil, and five Pine Tars. While Hardwood and Pine Tar are not difficult to obtain, Truffle Oil is harder to acquire in large quantities without raising pigs, which can be costly.
Reaching Foraging level 9 before the first year’s Summer thunderstorms and raising pigs to obtain enough Truffle Oil is challenging. Therefore, crafting large amounts of Rain Totems on your own is more likely in the second year.
The second method is by opening chests in Skull Cavern’s treasure floors. Chests have a 1/26 chance of containing one to three Rain Totems. This probability is the same as finding an Auto-Petter. So, obtaining enough Rain Totems by the first year’s Summer can be quite difficult. You could try save-scumming, but each reload is equivalent to playing another day, and the effort spent won’t disappear with each reload. This method involves exchanging a large amount of effort for a higher success rate.
This challenge is also present when trying to obtain Crystalariums. If the recipe could be unlocked earlier or the chance of finding Rain Totems in chests was higher, perhaps more players would engage with this aspect of the game.